
Windows Bootable ISO on a USB Disk in OSX Mavericks
As the title already suggests, this post describes how to make a bootable USB Disk which you can use to install Windows 7 (or 8/8.1) on your PC.
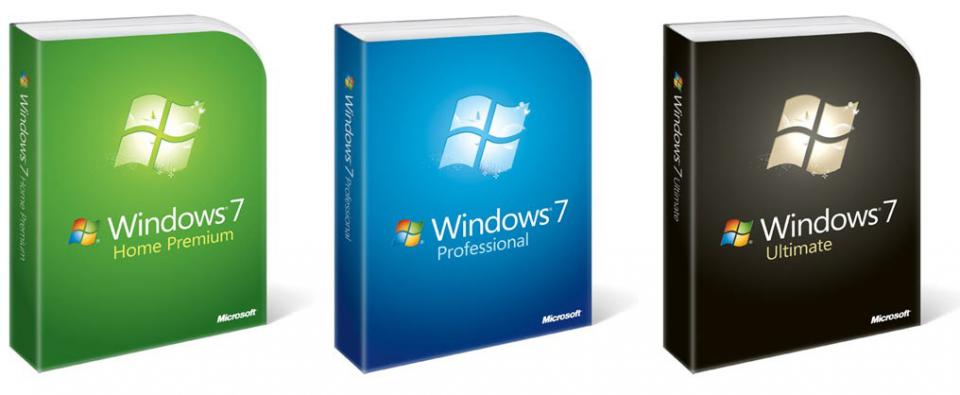
I've been looking on the web for a tutorial on how to make a bootable USB disk on a Mac to install Windows on another machine, though most tutorials were referring to old OSX versions (and so they were not working on Mavericks anymore). So I tried myself, and luckily it isn't that hard anymore.
What do you need?
- A Mac with OSX Mavericks
- A Windows ISO image
- A USB disk
How does it work?
- Insert the USB disk into a USB port
- Launch Boot Camp Assistant (located in Applications > Utilities)
- Select the first option (Create a Windows 7 or later version install disk) and unselect the others
- Select the USB disk
- When Boot Camp Assistant is finished, you have a Bootable USB Disk which you can use to install Windows on your PC.

Easy, right? Enjoy!
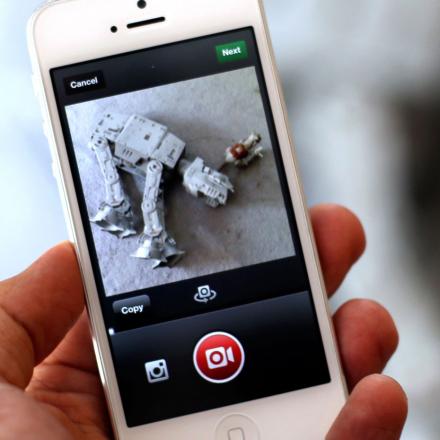
Record square video in iOS
I've been looking for some sample code on recording square video's (like Instagram) but didn't find a complete working solution. So after some digging around on Apple's Developer Portal and StackOverflow, I took the cow by the horns and made one myself.
The basic solution comes from StackOverflow, but the key part was missing and caused my movies to screw up. The important part which needed to be added was the rotation to portrait and the transform (as otherwise the rotation would move the video out of bounds).
Below's the complete code, starting from an existing movie on disk (filePath) up till writing out the square movie to disk (outputPath).
[objc] // output file NSString* docFolder = [NSSearchPathForDirectoriesInDomains(NSDocumentDirectory, NSUserDomainMask, YES) lastObject]; NSString* outputPath = [docFolder stringByAppendingPathComponent:@"output2.mov"]; if ([[NSFileManager defaultManager] fileExistsAtPath:outputPath]) [[NSFileManager defaultManager] removeItemAtPath:outputPath error:nil]; // input file AVAsset* asset = [AVAsset assetWithURL:[NSURL fileURLWithPath:filePath]]; AVMutableComposition *composition = [AVMutableComposition composition]; [composition addMutableTrackWithMediaType:AVMediaTypeVideo preferredTrackID:kCMPersistentTrackID_Invalid]; // input clip AVAssetTrack *clipVideoTrack = [[asset tracksWithMediaType:AVMediaTypeVideo] objectAtIndex:0]; // make it square AVMutableVideoComposition* videoComposition = [AVMutableVideoComposition videoComposition]; videoComposition.renderSize = CGSizeMake(clipVideoTrack.naturalSize.height, clipVideoTrack.naturalSize.height); videoComposition.frameDuration = CMTimeMake(1, 30); AVMutableVideoCompositionInstruction *instruction = [AVMutableVideoCompositionInstruction videoCompositionInstruction]; instruction.timeRange = CMTimeRangeMake(kCMTimeZero, CMTimeMakeWithSeconds(60, 30) ); // rotate to portrait AVMutableVideoCompositionLayerInstruction* transformer = [AVMutableVideoCompositionLayerInstruction videoCompositionLayerInstructionWithAssetTrack:clipVideoTrack]; CGAffineTransform t1 = CGAffineTransformMakeTranslation(clipVideoTrack.naturalSize.height, -(clipVideoTrack.naturalSize.width - clipVideoTrack.naturalSize.height) /2 ); CGAffineTransform t2 = CGAffineTransformRotate(t1, M_PI_2); CGAffineTransform finalTransform = t2; [transformer setTransform:finalTransform atTime:kCMTimeZero]; instruction.layerInstructions = [NSArray arrayWithObject:transformer]; videoComposition.instructions = [NSArray arrayWithObject: instruction]; // export exporter = [[AVAssetExportSession alloc] initWithAsset:asset presetName:AVAssetExportPresetHighestQuality] ; exporter.videoComposition = videoComposition; exporter.outputURL=[NSURL fileURLWithPath:outputPath]; exporter.outputFileType=AVFileTypeQuickTimeMovie; [exporter exportAsynchronouslyWithCompletionHandler:^(void){ NSLog(@"Exporting done!"); }]; [/objc]NWImageViewer
So often you need to show a UIImage which allows zooming & panning. You could either use a fullblown imageview controller (which takes over all ownership of the image viewing), or write it yourself within your viewcontroller.
I stumbled upon this issue multiple times. I wanted to show a UIImage somewhere on screen and add support for zooming and panning. Each time I was messing around with a UIScrollView in combination with a UIImageView and every time it was a lot of work in order to get all features implemented people were expecting (double-tap, single-tap, ...). I looked at both EGOPhotoViewer and MWPhotoBrowser but since they both force to use their UIViewController too, it wasn't a viable solution (they add a toolbar, navigationbar, ...)
I now created a public Github library, NWImageViewer (based upon work from Michael Waterfall (MWPhotoBrowser)) which exactly does this. Provide you with a single UIView which you can set a UIImage on, and the view supports zooming and panning. It informs you when important things happen through a delegate.
Go check it out and let me know what you think!
Alcatraz, the Xcode Package Manager
As it doesn't always have to be source code, today's tip is about a package manager on top of Xcode named Alcatraz.
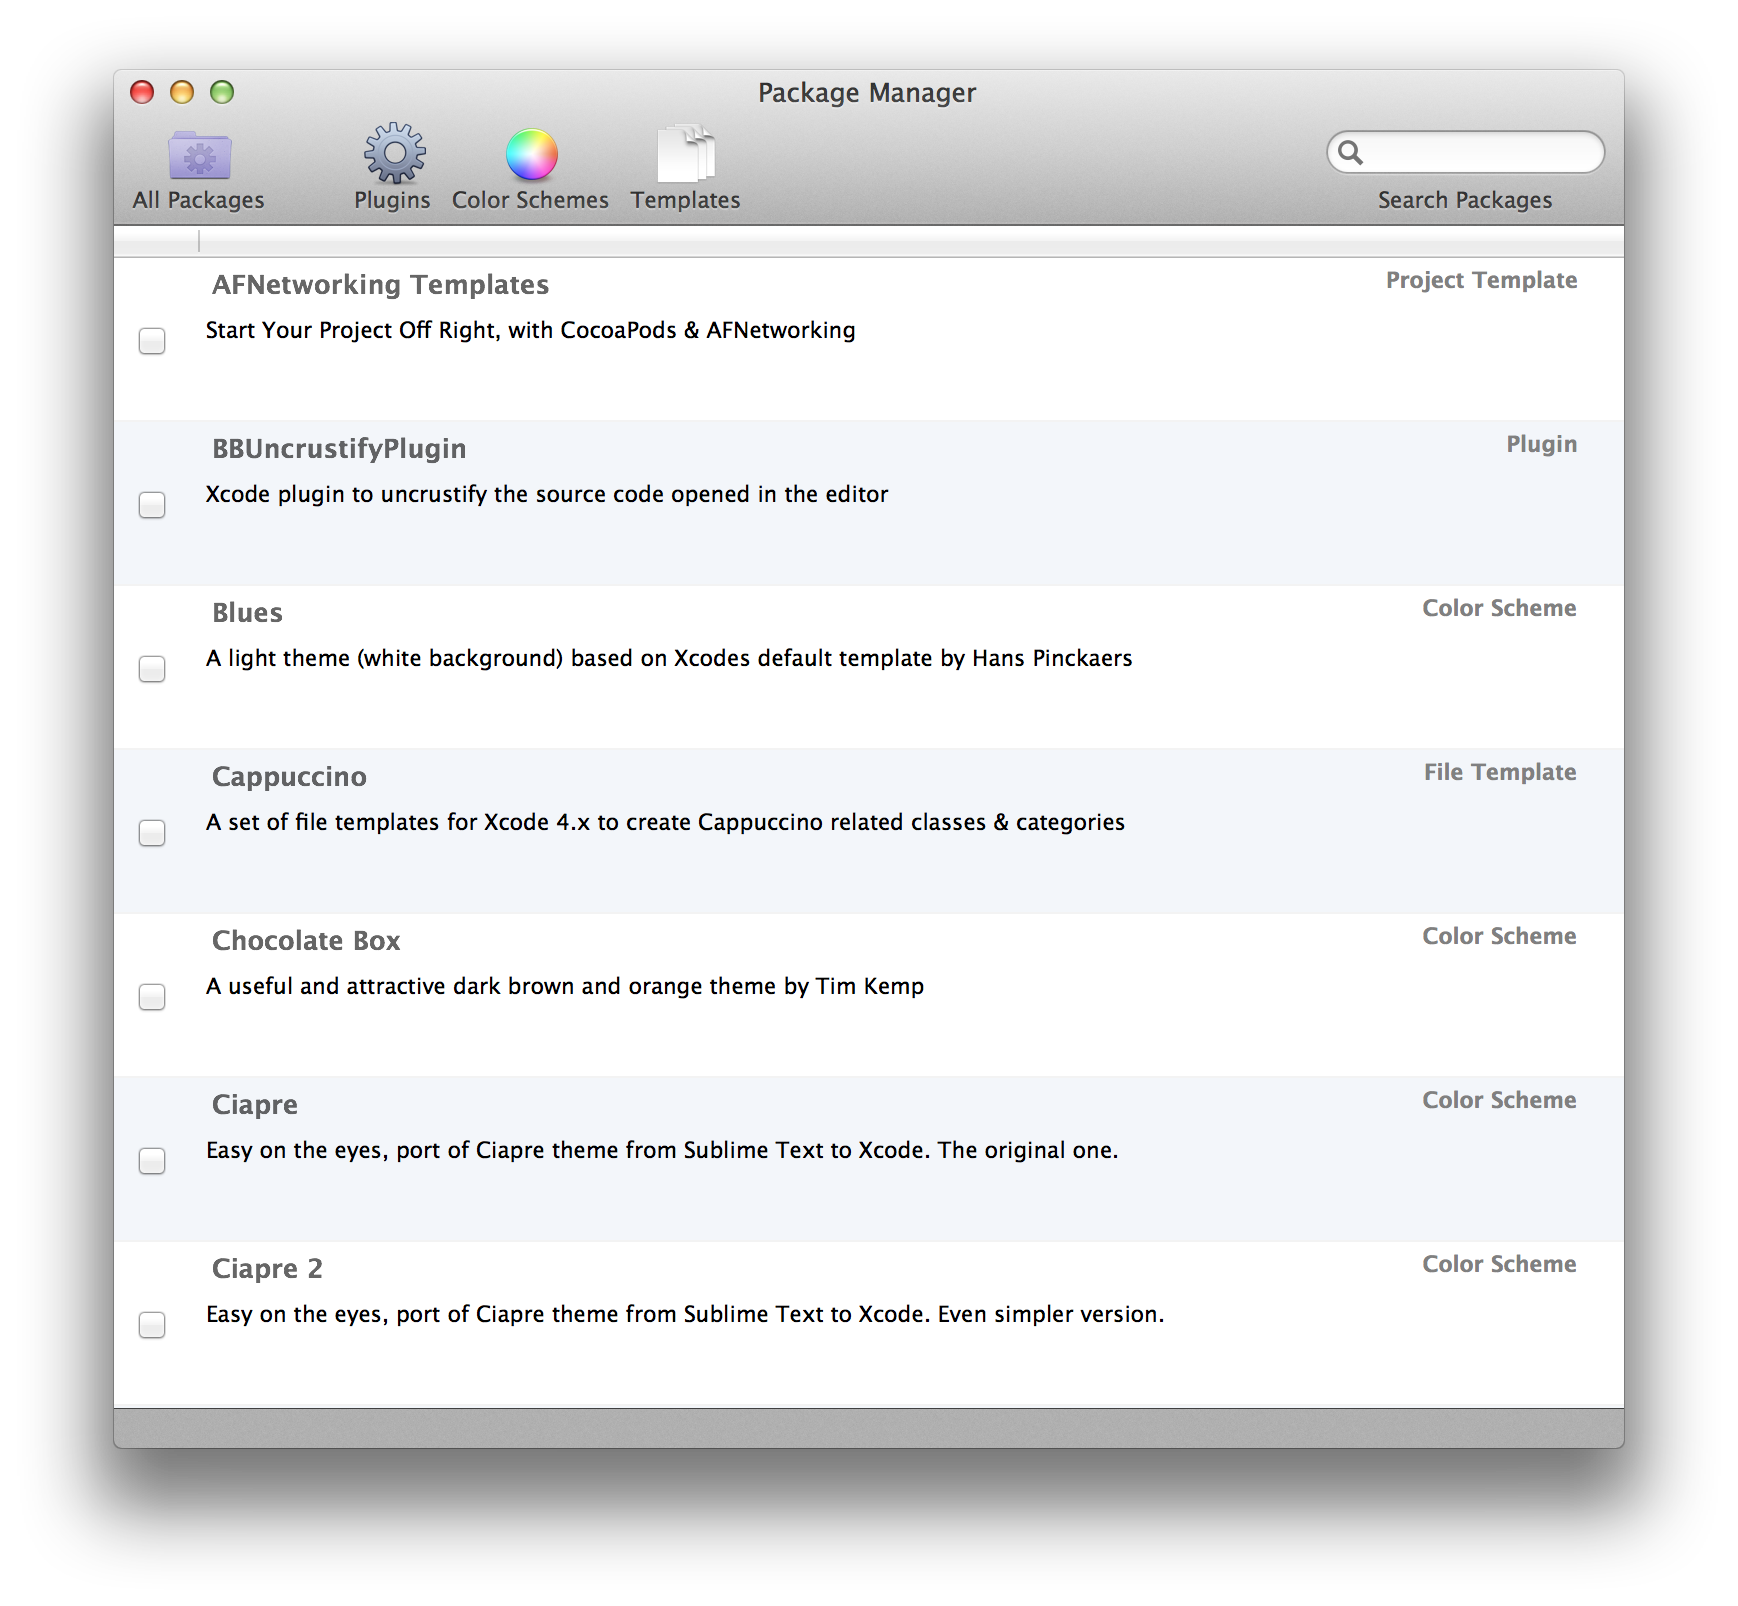
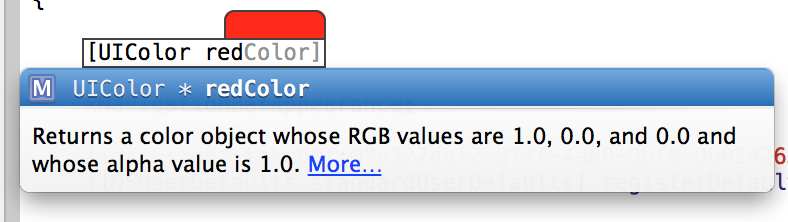
A few weeks ago I installed the package manager as it seems to contain some nice packages, and indeed - it does come in handy. I've enabled the OMColorSense module, which shows a nice preview popup each time you create a UIColor/NSColor in code to show a preview on how the color looks like.
Alcatraz contains some more nice packages, like a bunch of custom themes and templates, as well as small utilities to tweak Xcode's (sometimes odd) behaviour. Go check it out yourself, by installing the package manager from here.
QuickLook for the win
So you want to present a CSV, Microsoft Office, iWorks or RTF document in your iOS app? Instead of writing a viewer-interface for these formats yourself, you might want to use the QuickLook.framework within iOS to do the heavy lifting for you.
In a recent project, I needed to present a CSV file for viewing purposes. Nothing fancy, the data should just be shown in a grid-like style. While looking for an elegant solution, I stumbled upon QuickLook.framework. It's available in iOS as of iOS4 and is pretty easy to use. Below is some sample code in order to get QuickLook to preview a CSV file named mycontent.csv (in the application bundle).
[objc] -(void)previewCSV { QLPreviewController* previewController = [[QLPreviewController alloc] init]; previewController.delegate = self; previewController.dataSource = self; [self presentModalViewController:previewController animated:YES]; [previewController.navigationItem setRightBarButtonItem:nil]; } #pragma mark Quicklook - (NSInteger)numberOfPreviewItemsInPreviewController:(QLPreviewController *)controller { return 1; } - (idUIMenuItem with a UIImage in UIWebView
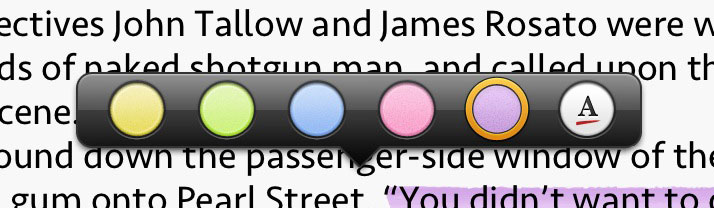
Ever wondered how iBooks shows their highlight-color UIImages when you select a paragraph? Below's a tutorial on how to achieve this in a UIWebView.
Since the initial release of ActionNotes, we used the Omni Group's OmniUI-library. It leverages CoreText as it's render engine for the text editor which we use in ActionNotes. In ActionNotes we need fine level control on what (x,y) coordinates each line of text is placed, as we need to overlay that line with a highlight marker.
The problem with making your own text editor is that you need to implement everything yourself. Want text selection? Do it yourself! Want cut/copy/paste? DIY! Want to show a loupe on a long touch? DIY. So, after a long investigation, I've changed the underlying editing system in ActionNotes with UIWebView. Yes, that's right. Since iOS5 you can use the contentEditable HTML attribute in order to have an editable divin your HTML. And with some Javascript, it's possible to get the (x, y)coordinates of HTML element, exactly what we need to show the marker highlight. Maybe I'll write a blog post later on to describe in detail how I've achieved to implement all ActionNotes' features into a UIWebView with JavaScript/JQuery.
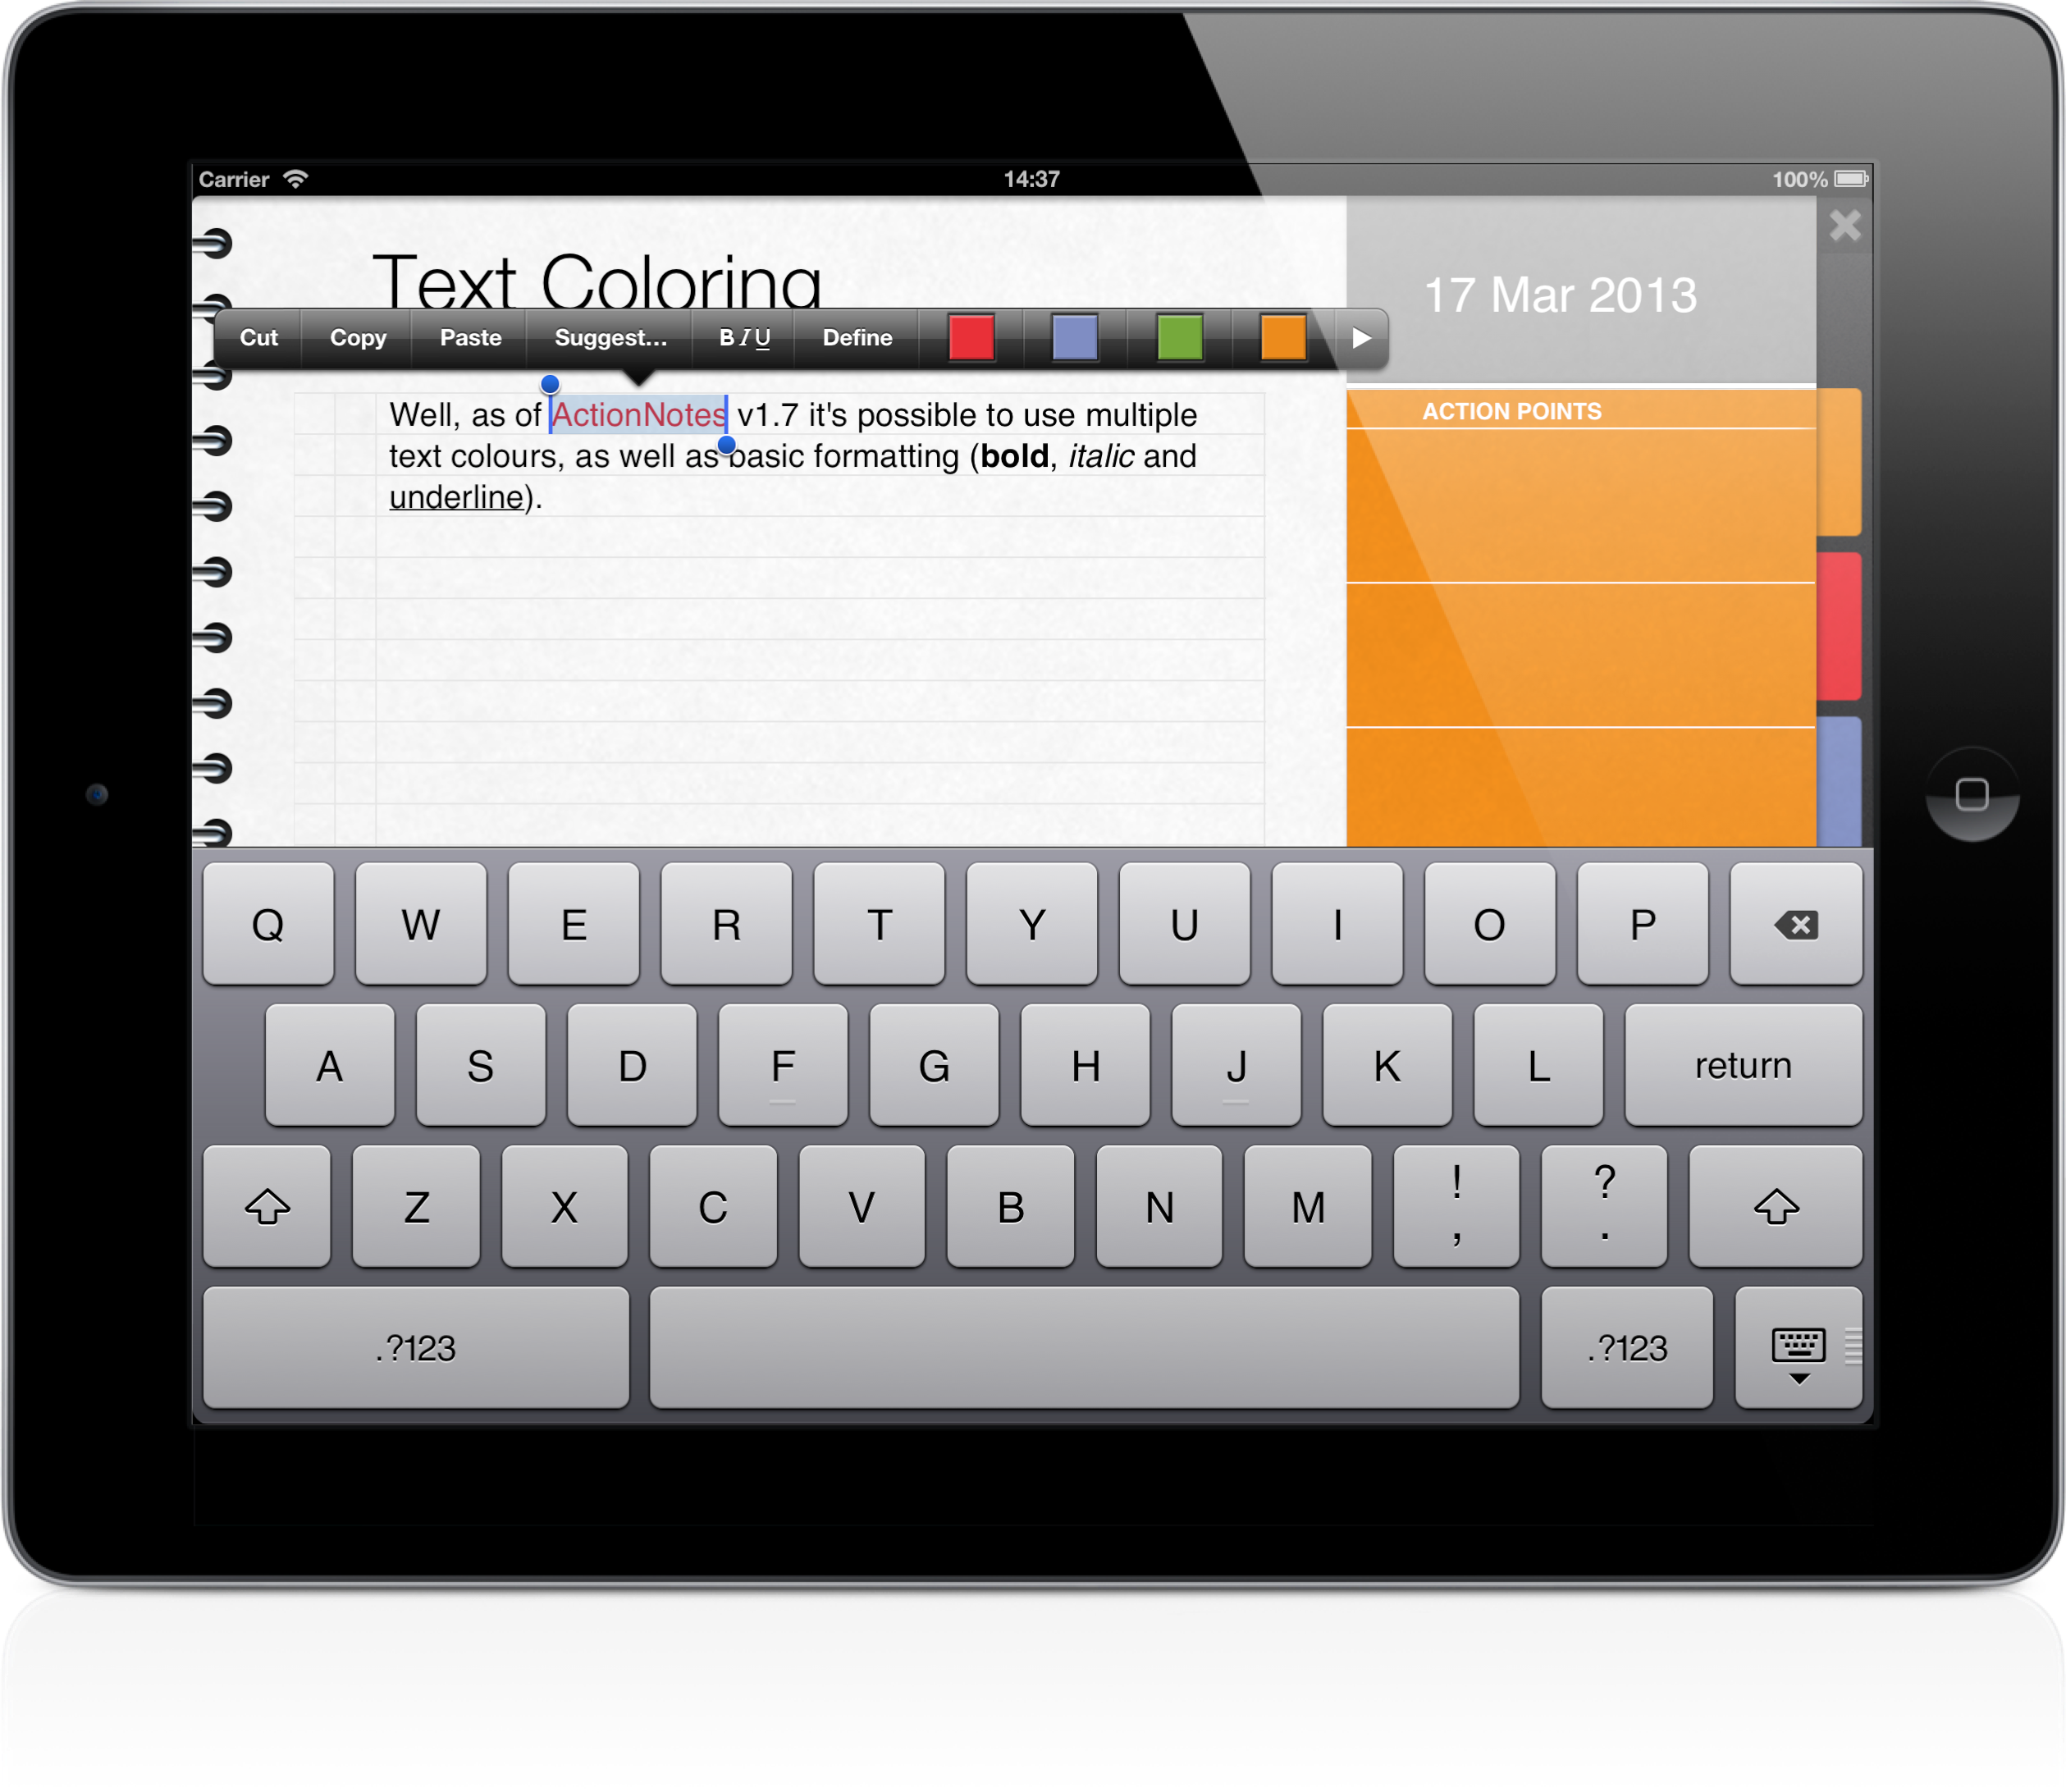
Now, back to iBook's UIMenuItem. With the standard UIMenuItem, you cannot show any UImage's. That's where UImenuItem+CXAImageSupport comes in. It does some ObjC magic in order to show an image where normally the text is rendered! Now that's only part of the solution, as the location of the updated UIMenuController is wrong.
In order to overcome this glitch, I use 2 techniques: I first try to get the selection rectangle using Javascript insertion. In case no text is selected, it returns an empty rectangle and so I fallback to the last tapped location in the UIWebView.
All combined in code, this looks more or less like this:
Objective-C part
[objc] -(void)viewDidLoad { UIMenuItem *changeTextColorMI = [[UIMenuItem alloc] initWithTitle:@"Text Color" action:@selector(changeTextColor:)]; [[UIMenuController sharedMenuController] setMenuItems:[NSArray arrayWithObject:changeTextColorMI]]; } - (CGRect)rectForSelectedText { CGRect selectedTextFrame = CGRectFromString([self.noteView stringByEvaluatingJavaScriptFromString:@"getRectForSelectedText()"]); return selectedTextFrame; } -(void)changeTextColor:(UIMenuController*)sender { isShowingSubmenu = YES; UIMenuController *mc = [UIMenuController sharedMenuController]; [mc setMenuItems:@[[[UIMenuItem alloc] cxa_initWithTitle:@"Red" action:@selector(redColor:) image:[UIImage imageNamed:@"red.png"]], [[UIMenuItem alloc] cxa_initWithTitle:@"Blue" action:@selector(blueColor:) image:[UIImage imageNamed:@"blue.png"]], [[UIMenuItem alloc] cxa_initWithTitle:@"Green" action:@selector(greenColor:) image:[UIImage imageNamed:@"green.png"]], [[UIMenuItem alloc] cxa_initWithTitle:@"Orange" action:@selector(orangeColor:) image:[UIImage imageNamed:@"orange.png"]], [[UIMenuItem alloc] cxa_initWithTitle:@"Grey" action:@selector(greyColor:) image:[UIImage imageNamed:@"grey.png"]], [[UIMenuItem alloc] cxa_initWithTitle:@"Pink" action:@selector(pinkColor:) image:[UIImage imageNamed:@"pink.png"]], ]]; if ([self rectForSelectedText].size.width) [mc setTargetRect:[self rectForSelectedText] inView:self.noteView]; else [mc setTargetRect:CGRectMake(lastTapInBackground.x, lastTapInBackground.y, 10, 10) inView:self.noteView]; [mc setMenuVisible:YES animated:NO]; } [/objc]Javascript part
[javascript] function getRectForSelectedText() { var selection = window.getSelection(); var range = selection.getRangeAt(0); var rect = range.getBoundingClientRect(); return "{{" + rect.left + "," + rect.top + "}, {" + rect.width + "," + rect.height + "}}"; } [/javascript]Large Progress Indicator
It's been some time since I published a public component, so here's another one: Large Progress Indicator.
As the title suggest, it's a progress indicator view, whereby the progress value is shown within the indicator. Nothing extraordinary, though a nice effect, especially in combination with a HUD overlay.
You can grab a copy of the project here on Github. And if you like the code, please let me know!
Paper-curl border
I wanted to have a special pagecurl effect on top of a UIImageView. After some Google'ing it doesn't seem that hard to do and so I created a small project to showcase it.

The pagecurl effect just uses some Quartz-properties on the underling CALayer of UIImageView, more specifically the border and shadow properties. Below's the code to set the border and shadow, and you can download the NWImageView class which implements the pagecurl-border.
Render 3D objects in OpenGL ES
So you created a gorgeous 3D model in Cinema4D and want to have it rendered in an iPhone app? And it should be able to rotate and zoom the object by handling touches? Look no further and enjoy.
I was looking for such a solution and stumbled upon mtl2opengl, a Perl script to convert a 3D model into a header file which can easily be used in a OpenGL/ES app. Ricardo even provided an Xcode boilerplate app to demonstrate this.
I then enhanced the code to handle touches and pinches in order to allow for rotation and zooming and the result is fabulous.
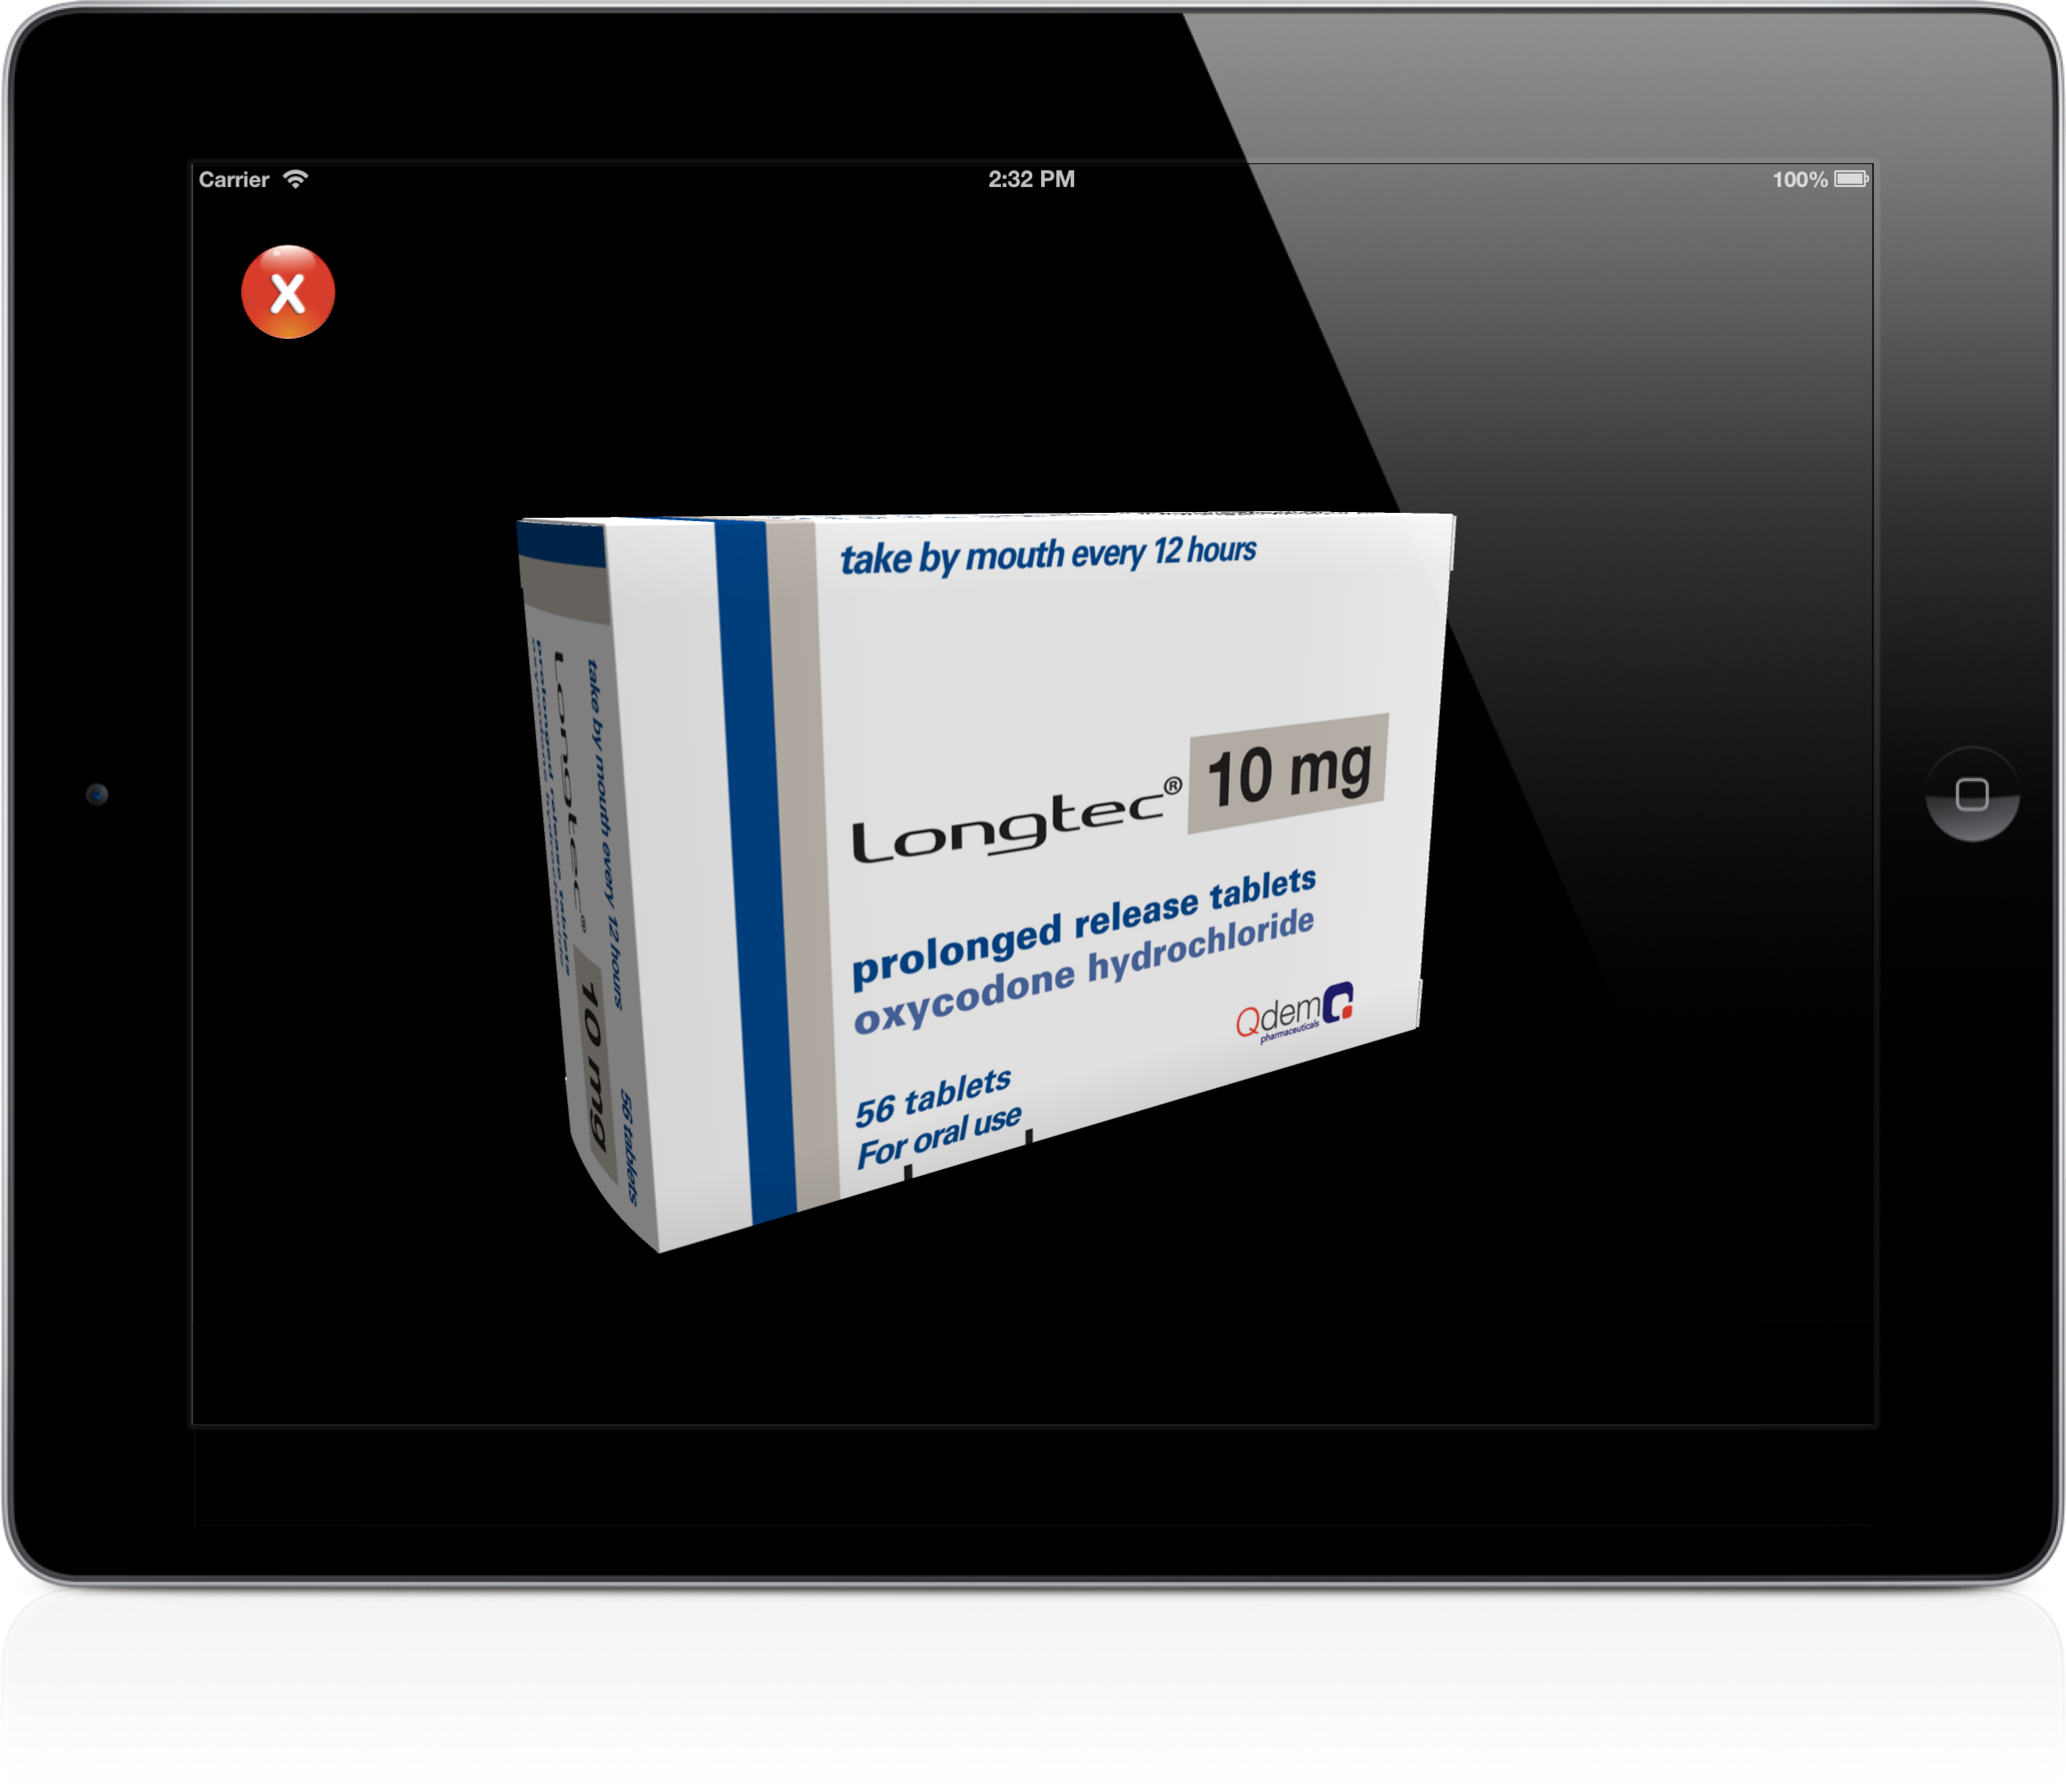
Now, for the technical part, this is the code which I added in order to support rotation and zooming. Not that hard, huh?
[objc] - (void)viewDidLoad { //.. added a pinch gesture recognizer UIPinchGestureRecognizer* pinch = [[UIPinchGestureRecognizer alloc] initWithTarget:self action:@selector(pinched:)]; [self.view addGestureRecognizer:pinch]; } -(void)pinched:(UIPinchGestureRecognizer*)sender { if([(UIPinchGestureRecognizer*)sender state] == UIGestureRecognizerStateEnded) { scale = 1.0; lastScale = 1.0; } else { scale = scale - (lastScale - sender.scale); lastScale = sender.scale; } } -(void)touchesMoved:(NSSet *)touches withEvent:(UIEvent *)event { UITouch* t = [touches anyObject]; rotation.x += ([t locationInView:self.view].x - [t previousLocationInView:self.view].x); rotation.y += ([t locationInView:self.view].y - [t previousLocationInView:self.view].y); } - (void)updateViewMatrices { //.. adapt the model view matrix with rotation and zoomscale _modelViewMatrix = GLKMatrix4MakeTranslation(0.0, 0.0, -0.6); _modelViewMatrix = GLKMatrix4Rotate(_modelViewMatrix, GLKMathDegreesToRadians(rotation.y), 1.0, 0.0, 0.0); _modelViewMatrix = GLKMatrix4Rotate(_modelViewMatrix, GLKMathDegreesToRadians(rotation.x), 0.0, 1.0, 0.0); _modelViewMatrix = GLKMatrix4Scale(_modelViewMatrix, 0.4 * scale, 0.4 * scale, 0.4 * scale); } [/objc]
You can download a copy of the adapted code on Github
Netwalk at Macbeurs
Last sunday we were at Macbeurs in Limburg. We presented our app Parking and were interviewed bij One More Thing.
In case you missed it, you can take a look at our presentation here.